How to Use a Digital Microscope for PCB Soldering
How to Use a Digital Microscope for Soldering PCB Work
If you are looking for the best way to use a digital microscope for soldering PCB work, the short answer is this: choose a microscope with enough working distance, stable magnification, adjustable lighting and a solid stand, then position it so you can clearly inspect pads, joints and tiny SMD components while still leaving room for your soldering iron, tweezers and hot air tool. Based on our testing with bench soldering setups, a digital microscope can make PCB inspection, rework and micro soldering much easier when it is set up correctly.
TL;DR: For PCB soldering, a digital microscope is most useful when it gives you a clear image without blocking your tools. Prioritise working distance, a metal stand, adjustable LED brightness and smooth focus. For beginners and repair enthusiasts in the UK, a Jiusion USB microscope can be a practical choice for inspecting solder joints, checking bridges and handling fine-pitch rework, provided you reduce glare and mount it securely.
Key takeaways
- A digital microscope for PCB soldering helps you see solder bridges, lifted pads, cold joints and fine-pitch component alignment more clearly.
- Working distance matters just as much as magnification because you need space for your iron, flux, tweezers and hands.
- A metal stand is usually better than a light plastic stand for bench stability during soldering and inspection.
- Adjustable lighting is essential because shiny PCB surfaces and flux residue can create heavy glare.
- For UK users, USB-powered microscopes are convenient for electronics benches, especially when paired with a laptop or monitor.
What is the best digital microscope for soldering PCB work?
The best digital microscope for soldering PCB work is one that balances working distance, image clarity, stable mounting and ease of use. In practice, extremely high advertised magnification is often less important than a clear view of the solder joint with enough room to work underneath.
For example, when soldering fine-pitch ICs, replacing USB-C ports or inspecting SMD resistors, you need to see detail clearly without placing the lens so close that it gets in the way. Therefore, a practical electronics repair microscope should give you a comfortable bench setup rather than simply a bigger zoom number on the box.
Based on our testing on small repair benches, the most useful features are:
- A solid stand that does not wobble when the desk moves
- Manual focus that is easy to adjust mid-job
- LED brightness control to reduce reflections
- Enough clearance for a soldering iron and tweezers
- Simple USB connection to a Windows PC, laptop or compatible display
If you are still comparing options, see our comprehensive buying guide to digital microscopes for a broader UK-focused overview.
Why use a digital microscope for PCB soldering?
Modern circuit boards are compact, densely populated and often difficult to inspect with the naked eye. As components become smaller, the margin for soldering mistakes becomes smaller too. A digital microscope helps by showing the joint on screen in real time, so you can inspect pad wetting, pin alignment and possible solder bridges more accurately.
In addition, a soldering inspection camera can reduce eye strain during longer repair sessions. Instead of leaning over the bench for long periods, you can look at a larger screen and maintain a more comfortable posture. That is particularly useful for hobbyists, repair technicians and students working on repeated rework tasks.
According to UK guidance on safe display screen equipment and workstation setup, maintaining a comfortable viewing position can support better ergonomics during extended bench work. Although a microscope is not a substitute for a proper ESD-safe workstation, it can make precision tasks more manageable and less fatiguing.
What features matter most in a USB microscope for micro soldering in the UK?
How important is working distance for PCB soldering?
Working distance is one of the most important factors. It is the space between the microscope lens and the PCB. If that distance is too short, your soldering iron, hot air nozzle or tweezers will constantly hit the microscope or force you into awkward hand positions.
For that reason, many people buy a microscope based on magnification alone and then realise it is difficult to solder under it. A good digital microscope for soldering PCB jobs should let you see enough detail while still leaving room to work safely.
Why is a metal stand better than a plastic stand?
A stable stand reduces shake and helps keep the image steady while you work. This matters even more during drag soldering, reflow touch-ups or inspection of tiny pads. Based on our testing, a metal stand usually performs better on a busy electronics bench because it resists vibration more effectively than lightweight plastic alternatives.
Moreover, bench work often involves accidental knocks, cable movement and tool changes. A sturdier stand makes the microscope feel more reliable and easier to use for repeated inspection tasks.
Do you need very high magnification to solder PCBs?
No, not usually. For most PCB soldering tasks, usable magnification with a clear image is more important than extreme zoom. In fact, too much magnification can narrow your field of view and make orientation harder. For inspection, moderate magnification is often enough to spot cold joints, bridges and poor alignment.
So, while high zoom can be helpful for fault finding, everyday soldering and rework are usually easier with a balanced setup that shows both the joint and the surrounding pads.
How important is lighting on shiny circuit boards?
Lighting is critical. PCBs, solder and flux residue reflect light strongly, which can wash out the image. Therefore, adjustable LEDs are much better than a fixed bright ring light. If the board looks too shiny, reduce the LED brightness, angle the board slightly or add softer side lighting.
This is one of the most common setup issues with a soldering inspection camera, and it is also one of the easiest to fix once you know what causes it.
How do you set up a digital microscope for soldering PCB work?
Setting up the microscope properly makes a bigger difference than many beginners expect. Even a good microscope can feel frustrating if it is too low, too bright or badly positioned.
1. Position the stand securely
Place the stand on a stable, flat bench away from clutter. If possible, keep the USB cable routed so it does not pull on the camera body. Then check that the base does not rock when you rest your hands on the desk.
2. Raise the microscope for proper tool clearance
Next, adjust the height so you can fit your soldering iron, tweezers and hands comfortably beneath the lens. This is the step that determines whether the microscope is genuinely useful for micro soldering or only suitable for inspection.
3. Focus before applying heat
Bring the PCB into view, then focus on the pads or component leads before you start soldering. It is much easier to set focus while the board is still and your tools are out of the way.
4. Reduce glare from LEDs and flux
If the image looks blown out, lower the LED brightness and slightly tilt the board. In many cases, that single adjustment improves visibility immediately. Also, clean heavy flux residue where practical, as it can reflect light strongly.
5. Test your working angle
Before starting the actual repair, simulate the movement of your iron and tweezers. This helps confirm that the microscope is not blocking access. As a result, you are less likely to interrupt the job halfway through to reposition everything.
Can you actually solder through a digital microscope?
Yes, you can solder through a digital microscope, but it depends on latency, screen size and your own comfort level. For inspection and touch-up work, most users adapt quickly. However, for continuous fine-pitch soldering, some people still prefer a direct optical view because hand-eye coordination can feel more natural.
That said, many hobbyists and technicians use a digital microscope successfully for USB port replacements, connector repairs, jumper work and SMD rework. Based on our testing, success comes down to three things: low image lag, a stable stand and enough working distance.
If you are new to microscope-assisted soldering, start with inspection, pad cleaning and simple component placement first. Then move on to more delicate jobs once the screen-based view feels natural.
Is a digital microscope better than an optical microscope for electronics repair?
A digital microscope is often better for affordability, recording, screen sharing and beginner convenience. An optical microscope is often better for depth perception and real-time hand coordination. Therefore, the right choice depends on your budget, experience and the type of repair work you do most often.
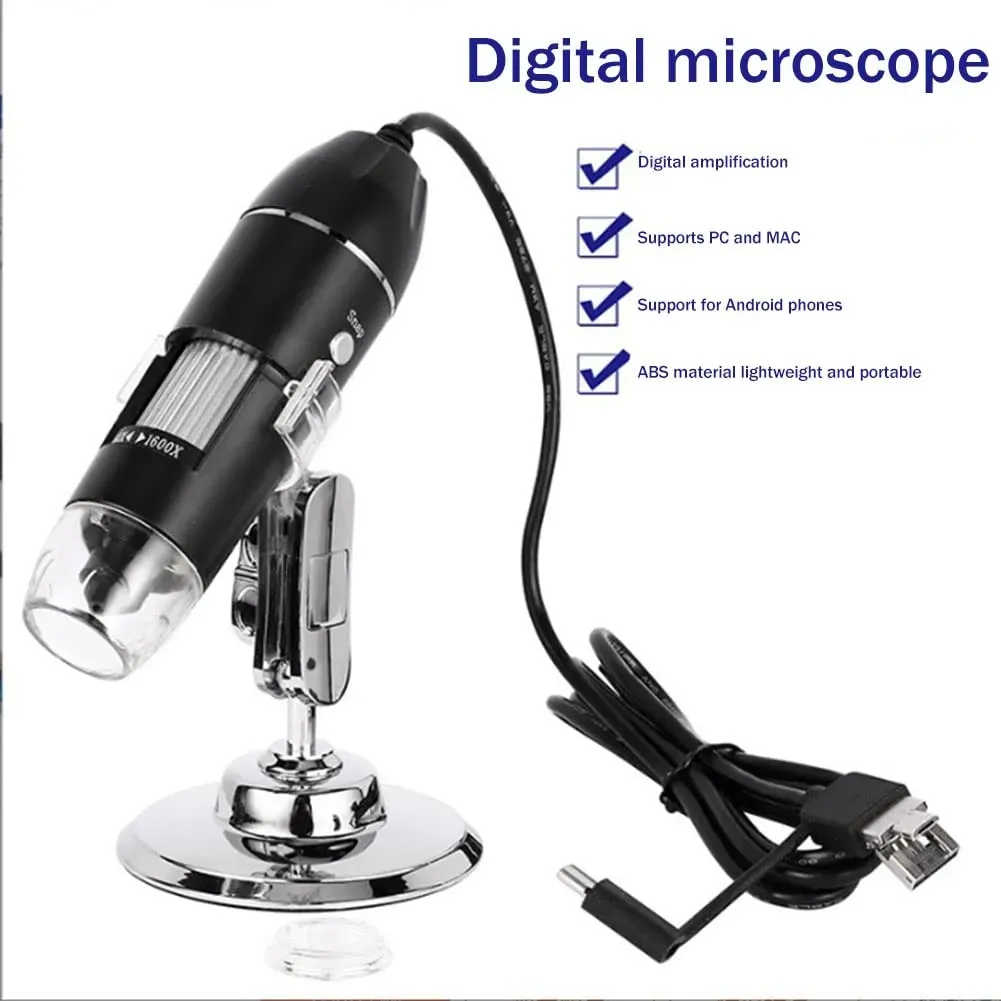
For many UK hobbyists, a Jiusion digital microscope offers a practical entry point because it is compact, USB-friendly and suitable for bench inspection. If you want a deeper comparison, read our Digital vs Optical Microscope guide.
What should you look for in a Jiusion digital microscope for PCB soldering?
When choosing a Jiusion microscope for soldering and inspection, focus on real-world usability rather than headline magnification. In particular, look for:
- Adjustable height and focus
- A stand suited to bench use
- Consistent image quality for pads and fine joints
- Brightness control for reflective boards
- Simple compatibility with your UK workshop setup
If you are shopping on a tighter budget, our guide to budget digital microscopes under £50 may help narrow the field.
For a full shortlist, model comparisons and practical buying advice, visit the Best Digital Microscope Buying Guide UK 2024.
What are the most common problems when using a microscope for PCB soldering?
Why does the image shake so much?
The usual causes are a light stand, a shaky bench or cable tension. A heavier base and cleaner cable routing often improve stability immediately.
Why do solder joints look too bright to inspect?
This is normally caused by direct LED reflection on solder or flux. Lower the brightness, add side lighting or change the angle of the PCB.
Why is there not enough room for the soldering iron?
The microscope is probably positioned too low. Raise it to increase working distance, even if that slightly reduces magnification.
Why does soldering feel awkward on screen?
There may be a short delay between movement and display, or the screen may be too small. A larger display and a little practice usually help.
Frequently asked questions about digital microscopes for soldering PCB
What is the best digital microscope for soldering PCB work?
The best option is one with enough working distance, a stable stand, adjustable LEDs and clear live image quality. For most users, these factors matter more than maximum advertised magnification.
Can you solder through a digital microscope?
Yes. Many users do, especially for SMD repair, connector work and inspection. However, comfort depends on lag, screen size and how well the microscope is positioned.
How much magnification do you need for PCB soldering?
You usually need moderate, usable magnification rather than extreme zoom. A wider field of view often makes soldering easier, while higher magnification is better reserved for close inspection.
Is a USB microscope good for micro soldering in the UK?
Yes, a USB microscope for micro soldering in the UK can be a practical choice because it is easy to power from a PC or laptop and suits small workbenches well. Just make t has a stable stand and enough clearance for tools.
Further reading
If you want help choosing the right model, start with our comprehensive buying guide to digital microscopes. You can also compare lower-cost options in our guide to budget digital microscopes under £50.
Final thoughts
A digital microscope for soldering PCB work can be an excellent tool for inspection, fault finding and precision rework, especially when it is set up with proper working distance and controlled lighting. Jiusion microscopes are particularly appealing to UK hobbyists and repairers who want a practical, screen-based solution without moving straight to a costly optical setup.
So, if your goal is cleaner solder joints, easier inspection and more confidence when handling tiny components, a well-chosen Jiusion microscope is worth considering. For the next step, explore our Best Digital Microscope Buying Guide UK 2024 to compare features in more detail.
Ready to try Jiusion?
Shop Now — £28.49